

How to Caulk a Bathtub Cleanly Using Painters Tape
A Repair First Method Learned Through Real Homes and Real Mistakes
The photos in this post are from the bathroom in the house where Eric and I live.
The home was built in 1950, and the bathtub and tile are original. The tub is large, deeply shaped, and comfortable in a way that newer tubs rarely are. The tile floor shows its age, as it should, but it remains in overall great condition and continues to function exactly as it was designed to.
This is not a staged project. This is ongoing care for a lived in home, and the same caulking method I use across all the homes we manage.
Why I Learned This Method the Hard Way
This method came out of necessity.
Like many property owners, we spent years working through the learning curve of hiring contractors whose skill level did not always match the work required. Older homes are less forgiving than new construction. When corners are off, grout fails, or waterproofing is rushed, the problems show up quickly.
Before we found a truly skilled tile professional, someone who can match corners on a herringbone pattern with precision and understands how tile, grout, and moisture behave together over time, we had to take responsibility for protecting what was already there.
Caulking became one of those responsibilities.
Repair First, Replace Only When There Is No Other Option
Caring for these details matters in both new and old homes, but older homes often need repair or correction before maintenance can begin again.
Our approach has always been:
Repair whenever possible
Preserve original materials when they are still sound
Replace only when repair is no longer viable
Check out our local Archectural Salvage to see if they have parts we need or upcycleable fixtures we love
We have also learned that not everything should be upcycled. There are a few eco friendly decisions we made early on that we later wished we had not. Some materials perform best when restored carefully, not reinvented.
This caulking method supports repair. It protects original tubs, tile, and finishes.
Step One: Remove All Old Caulk Completely
Old caulk has to come out before new caulk goes in.
I used a flat razor blade scraper (my favorite tool ever) to carefully remove the existing caulk along the tub edge and vertical seams. New caulk does not bond properly to old material, and layering it almost always leads to failure.
This step takes time, but it matters.
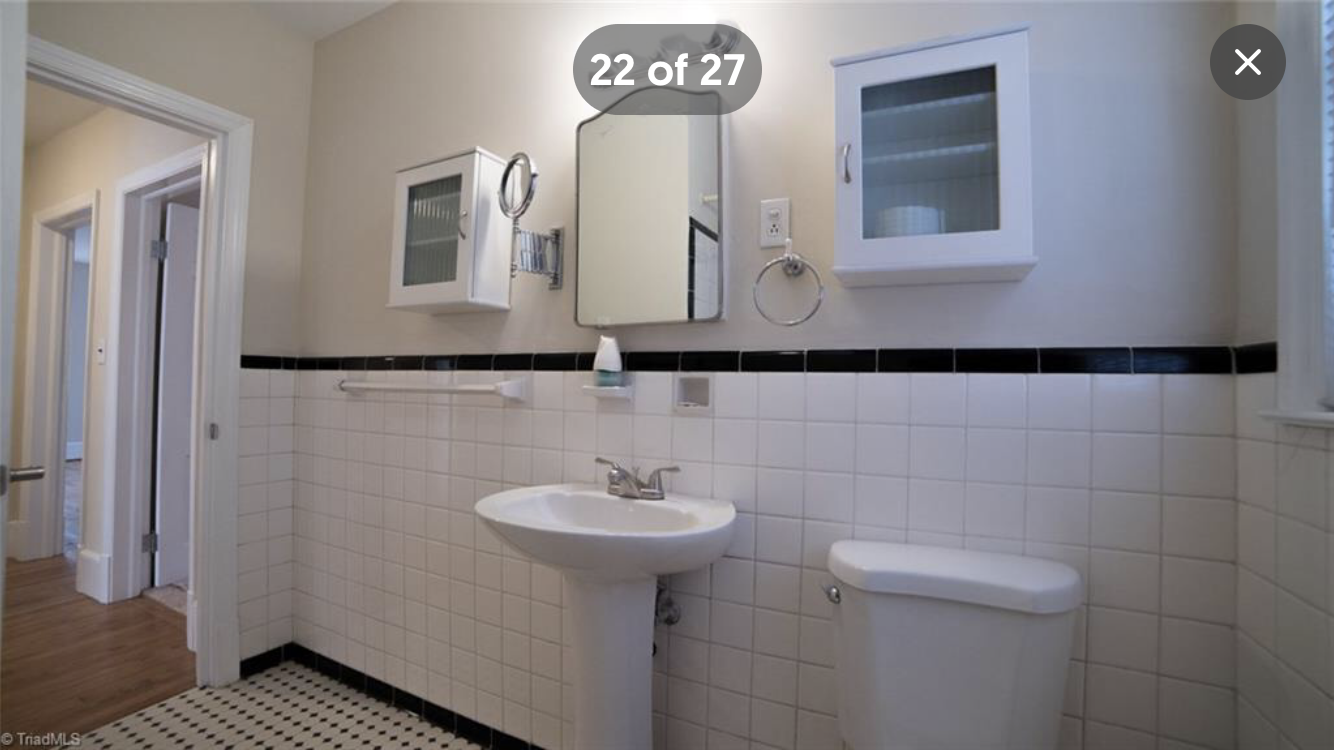
This is what the bathroom looked like when we moved into 909 W Wendover Ave in 2020. I do not remember the two side cabinets but we learned a lot when we hired a contractor to change out the medicine cabinet to a Brass Pottery Barn medicine cabinet I thrifted off Mercari.
I used a razor blad scraper to go across and clean every single crevide and cranny of dirt and unmentionable bits.
Step Two: Clean Without Leaving Residue
After scraping, I cleaned the surfaces using a no residue window cleaner. This removes soap buildup, dust, and oils without leaving behind anything that interferes with adhesion.
I then let the area dry completely.
Not just dry to the touch. Fully dry.
Photo placement 2: clean, dry surfaces before tape
SEO alt text:
Clean original tub and tile after removing old caulk, prepped for new bathroom caulking
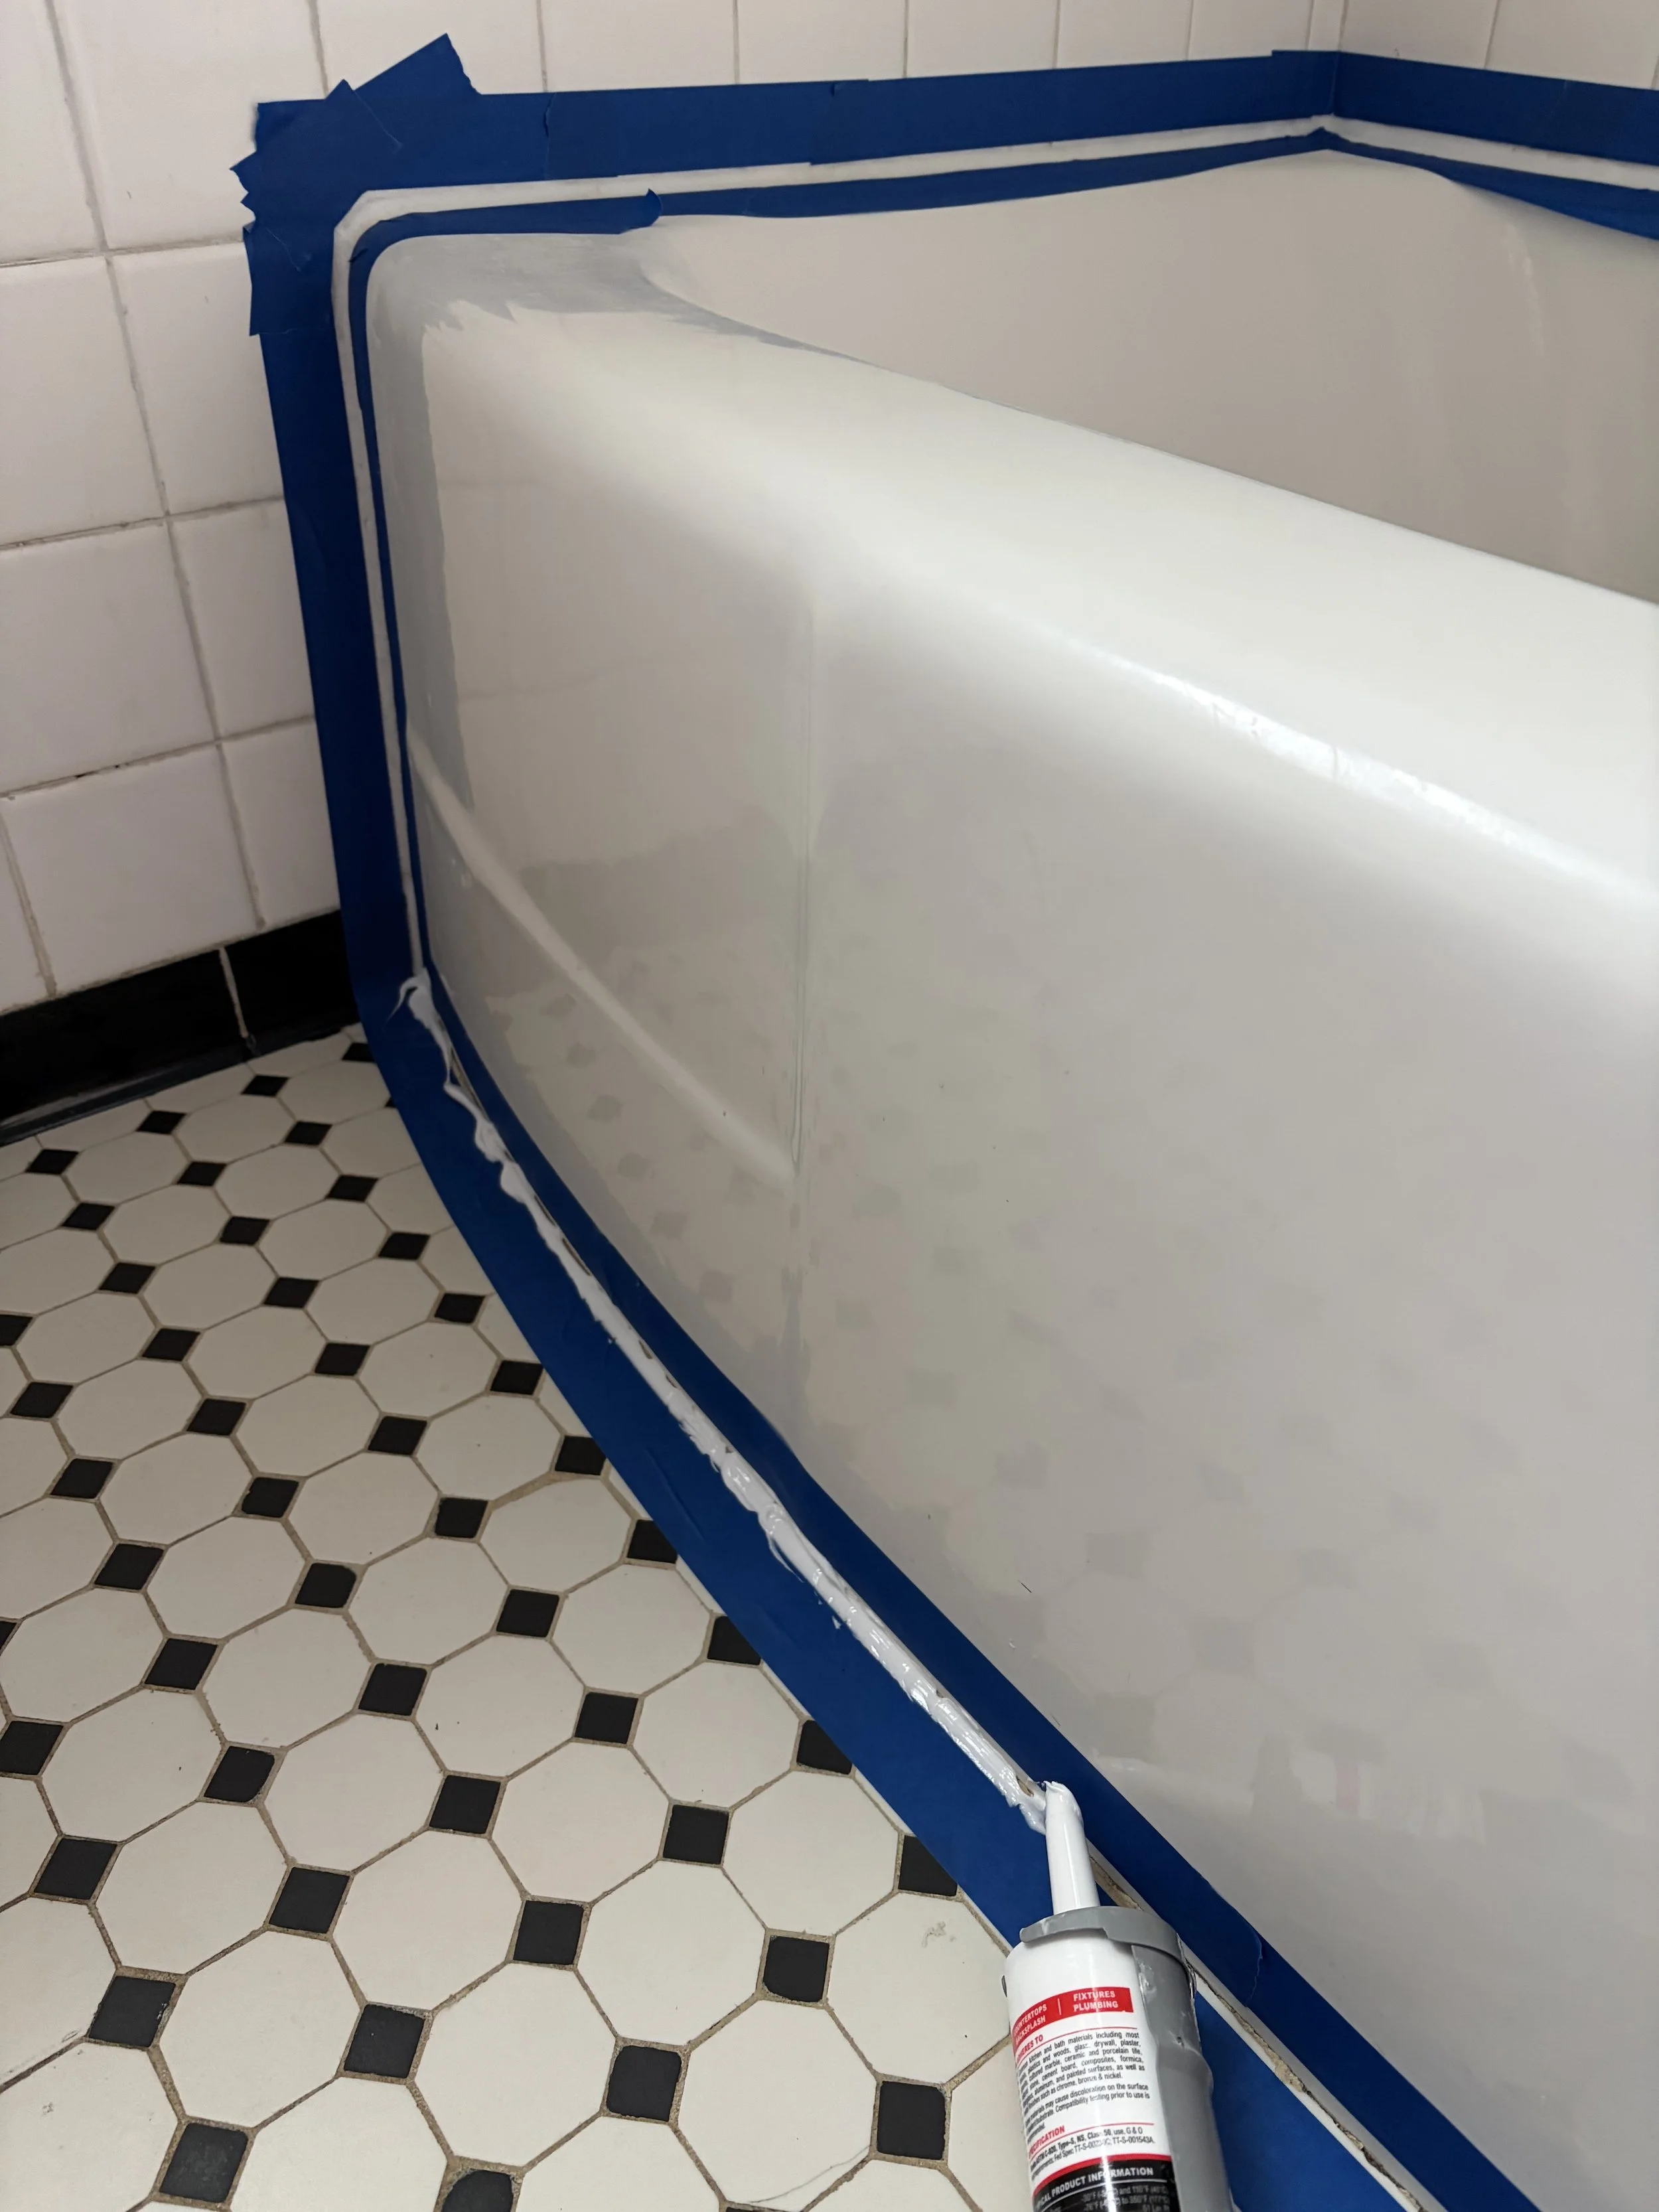
Step Three: Painters Tape Is the Training Wheels
Painters tape is what makes this method repeatable.
I applied blue painters tape along the tub edge and the tile edge, creating a narrow channel for the caulk. The tape defines the caulk line and protects the surrounding surfaces.
This works equally well in older homes and newer ones and removes the pressure to be perfect by hand.
Photo placement 3: taped tub and tile
SEO alt text:
Painters tape used to create clean caulk lines on original 1950 bathtub and tile
Step Four: Apply and Smooth the Caulk Carefully
I used white bathroom caulk with a lifetime warranty.
I cut the tip at an angle, punctured the inner seal, loaded the tube into the caulk gun, and wore latex gloves. I applied a steady bead within the taped channel.
To smooth the caulk, I used a wet finger, moving in one continuous motion.
Water keeps the caulk from sticking and allows your finger to create a clean, concave seal that actually performs.
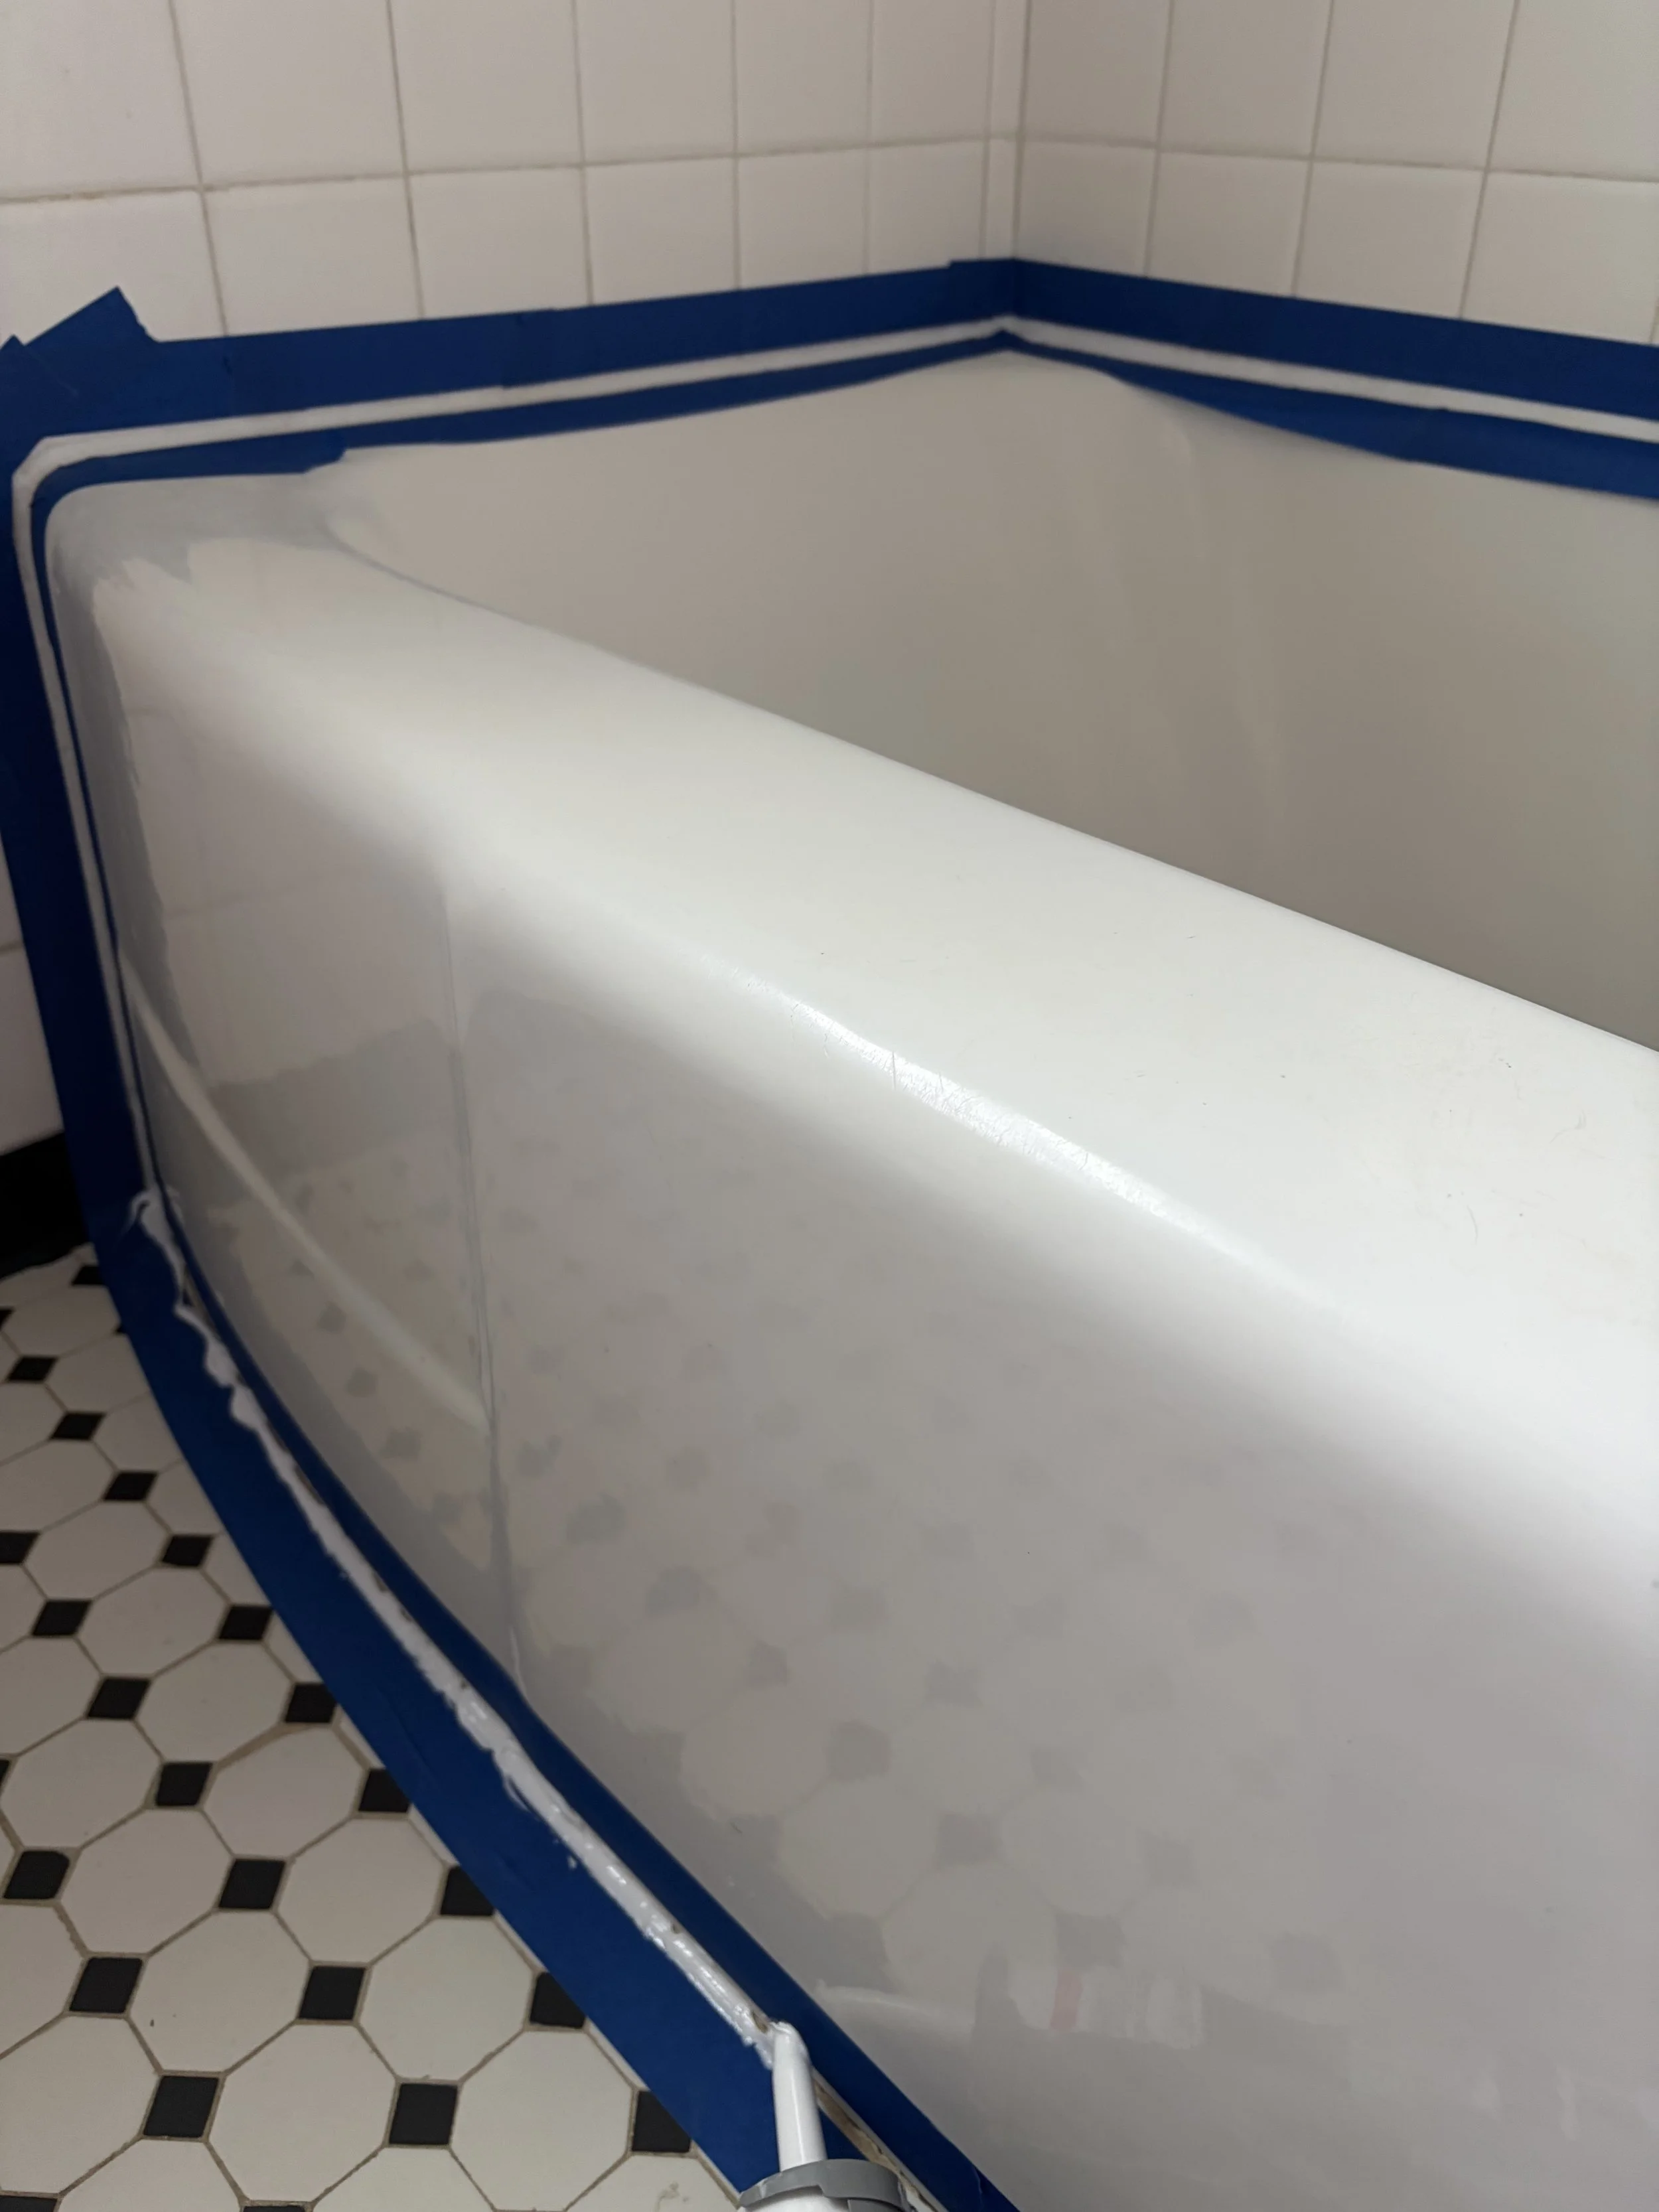
Step Five: Pull the Tape While the Caulk Is Still Wet
This step is critical.
Painters tape must be removed while the caulk is still wet. If you wait until it dries, the tape edge becomes embedded in the caulk and leaves a visible blue line that does not go away. At that point, the only fix is to remove the caulk and start over.
I pulled the tape slowly and at a low angle immediately after smoothing.
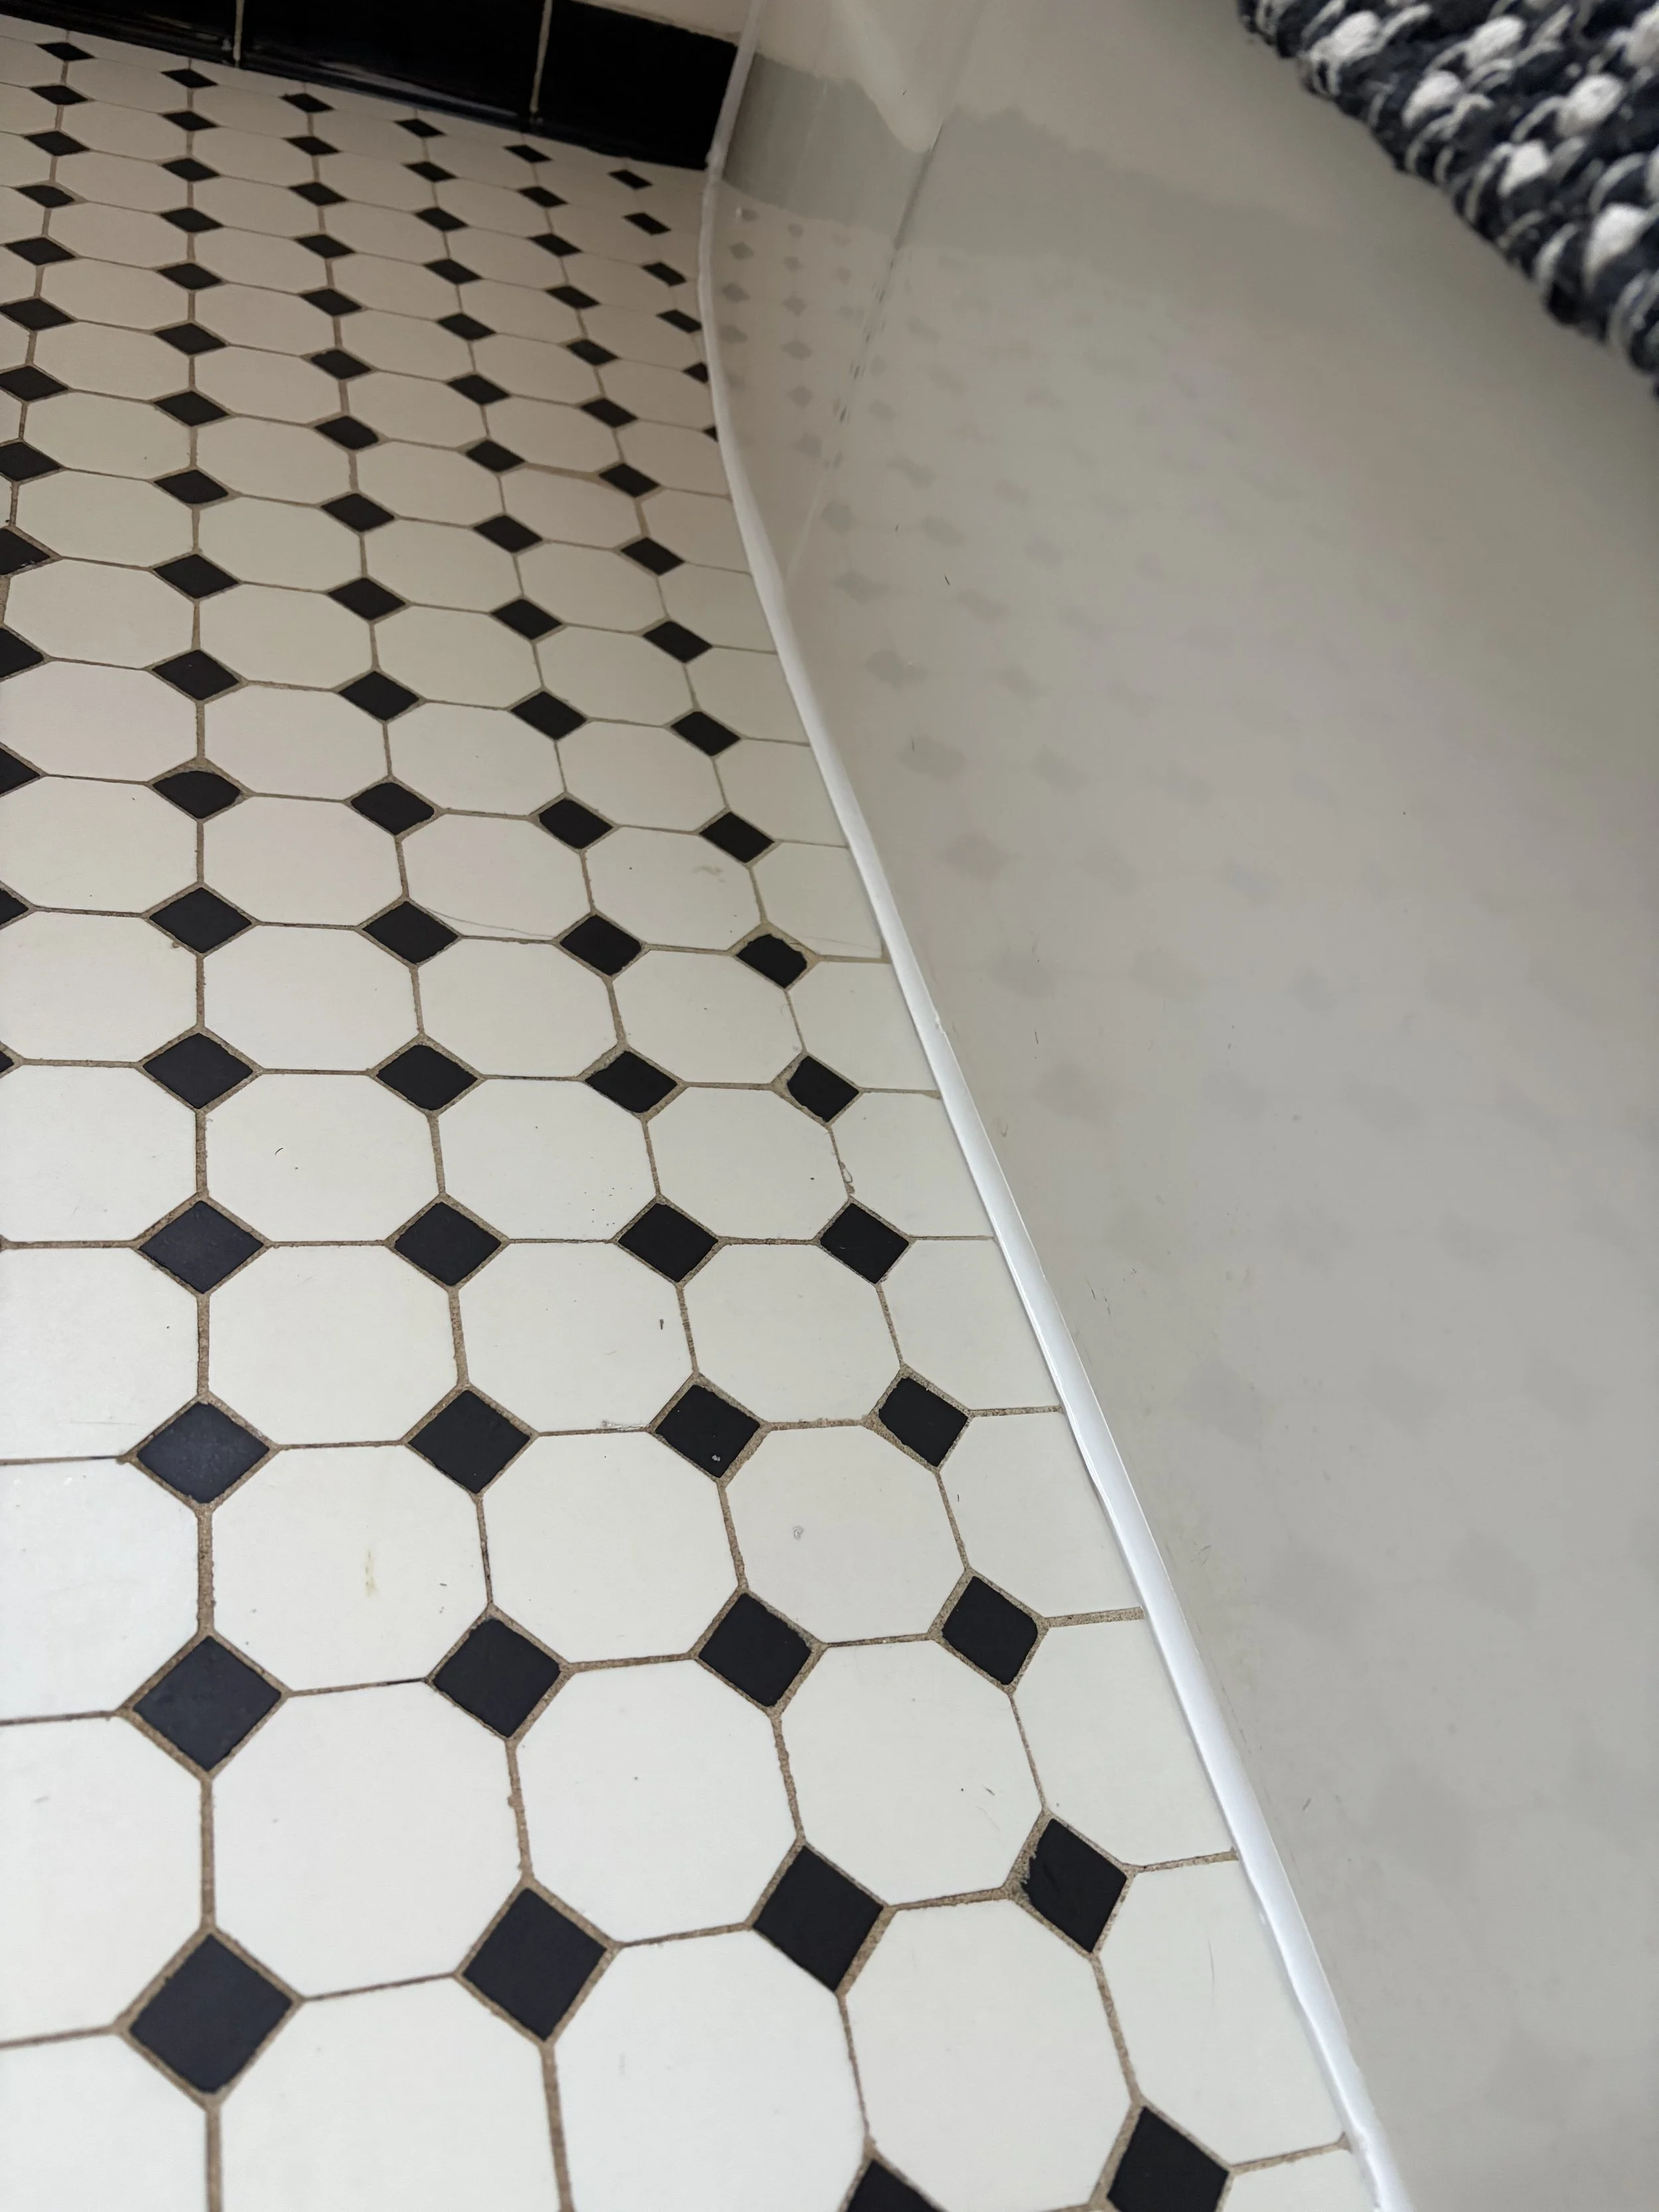
Photo placement 4: finished caulk line
SEO alt text:
Finished clean caulk line on original bathtub after removing painters tape while caulk is wet
Follow Cure Times Before Using the Tub
Before using the tub or shower, I followed the cure time listed on the caulk tube. Allowing the caulk to fully set protects the seal and extends its life.
Using the tub too soon can undo all the work.
Why This Matters
Proper caulking:
Protects original tubs and tile
Prevents water intrusion
Reduces mold risk
Extends the life of older bathrooms
Supports repair instead of unnecessary replacement
This is the same method I use in every home we manage, regardless of age.
Final Thoughts
This bathroom has history. It has wear. It has beauty. Embrace the Wabi Sabi
Maintaining original materials requires patience, respect, and an understanding of how things were built to last. Painters tape does not make caulking fancy. It makes it controlled, repeatable, and reliable.
Sometimes that is exactly what a home needs. If you need you bathtub reglazed or you need a legitimate contractor with skills to help you with your project, check out our preferred vendor page to see if we have a vendor we have worked with who we can share with you.